
If you’re reading this tutorial, you’ve probably heard a lot about building web applications with Node.js. Node is tiny and wasn’t really meant to build websites, which is why frameworks like Express.js are useful. Express gives Node structure so you can build a functional website. Along with a templating engine such as Handlebars.js, Node can be used to build fully functional web applications.
If you have any questions, please refer to the documentation for Node.js and Express.js. The code for this tutorial is also on GitHub.
Mac Installation
Install Node – Node can be installed from the Node.js website. You can also run brew install node in your command line (requires Homebrew). If you are unsure whether you have node installed, you can check using your command line:
♥♥♥ node -v
v0.10.28
The current version of node is v0.10.33. If you have an out of date version of node, you can update node from your command line with brew upgrade node (also requires Homebrew).
Node comes with npm, the Node Package Manager, which allows you to install, remove and update node modules (modules are simply reusable pieces of code).
Install Express – In your command line, run npm install -g express. If express is installed correctly, you should see the following output:
♥♥♥ npm install -g express
express@4.10.0 /usr/local/lib/node_modules/express
├── merge-descriptors@0.0.2
├── utils-merge@1.0.0
├── fresh@0.2.4
├── escape-html@1.0.1
├── cookie@0.1.2
├── range-parser@1.0.2
├── cookie-signature@1.0.5
├── finalhandler@0.3.2
├── media-typer@0.3.0
├── vary@1.0.0
├── parseurl@1.3.0
├── methods@1.1.0
├── serve-static@1.7.1
├── content-disposition@0.5.0
├── path-to-regexp@0.1.3
├── depd@1.0.0
├── qs@2.3.0
├── proxy-addr@1.0.3 (forwarded@0.1.0, ipaddr.js@0.1.3)
├── on-finished@2.1.1 (ee-first@1.1.0)
├── etag@1.5.0 (crc@3.0.0)
├── debug@2.1.0 (ms@0.6.2)
├── send@0.10.1 (destroy@1.0.3, ms@0.6.2, mime@1.2.11)
├── type-is@1.5.2 (mime-types@2.0.2)
└── accepts@1.1.2 (negotiator@0.4.9, mime-types@2.0.2)
You should also install the Express Generator:
♥♥♥ npm install -g express-generator
/usr/local/bin/express -> /usr/local/lib/node_modules/express-generator/bin/express
express-generator@4.9.0 /usr/local/lib/node_modules/express-generator
├── commander@1.3.2 (keypress@0.1.0)
└── mkdirp@0.5.0 (minimist@0.0.8)
Install MongoDB
♥♥♥ brew install mongodb
==> Downloading https://downloads.sf.net/project/machomebrew/Bottles/mongodb-2.6
######################################################################## 100.0%
==> Pouring mongodb-2.6.1.mavericks.bottle.tar.gz
==> Caveats
To have launchd start mongodb at login:
    ln -sfv /usr/local/opt/mongodb/*.plist ~/Library/LaunchAgents
Then to load mongodb now:
    launchctl load ~/Library/LaunchAgents/homebrew.mxcl.mongodb.plist
Or, if you don't want/need launchctl, you can just run:
    mongod --config /usr/local/etc/mongod.conf
==> Summary
   /usr/local/Cellar/mongodb/2.6.1: 17 files, 317M
Working with Node in the Command Line
Now that you have Node installed, you can work with Node directly in the command line. For any Rails developers, this is the equivalent of working in irb. Simple run node in the command line and you’ll be able to work directly with the Node server:
♥♥♥ node
> console.log("Hello World");
Hello World
undefined
>
Press Control+C twice to exit.
Running Node Scripts
Running Node scripts is quick and easy. Create a directory, cd into that directory, and create a file called index.js (touch index.js). Inside that file, add the following:
console.log("Hello World.");
Return to your terminal and execute the following:
♥♥♥ node index.js
Hello World.
As you can see, this will run your node script. You can also do the following:
♥♥♥ node .
Hello World.
This would be awesome if all you wanted to do was run simple Node scripts.
Creating an Express App
To create a new Node app using Express, simply run express <app-name> in the command line:
♥♥♥ express NodeExpressApp

   create : NodeExpressApp
   create : NodeExpressApp/package.json
   create : NodeExpressApp/app.js
   create : NodeExpressApp/public
   create : NodeExpressApp/public/javascripts
   create : NodeExpressApp/public/stylesheets
   create : NodeExpressApp/public/stylesheets/style.css
   create : NodeExpressApp/public/images
   create : NodeExpressApp/routes
   create : NodeExpressApp/routes/index.js
   create : NodeExpressApp/routes/users.js
   create : NodeExpressApp/views
   create : NodeExpressApp/views/index.jade
   create : NodeExpressApp/views/layout.jade
   create : NodeExpressApp/views/error.jade
   create : NodeExpressApp/bin
   create : NodeExpressApp/bin/www

   install dependencies:
     $ cd NodeExpressApp && npm install

   run the app:
     $ DEBUG=NodeExpressApp ./bin/www
Once this is run, you should see several directories inside your app – bin, public, routes and views, along with app.js and package.json files.
package.json
Node.js packages are like small frameworks included in a package.json file. If you’re a Rails developer, these would be similar to the gems included in your Gemfile. For a complete list of available packages, visit the Node Package Manager. You can also develop your own packages.
Open your app inside the text editor of your choice. Your package.json file should contain the following:
{
  "name": "NodeExpressApp",
  "version": "0.0.0",
  "private": true,
  "scripts": {
    "start": "node ./bin/www"
  },
  "dependencies": {
    "express": "~4.9.0",
    "body-parser": "~1.8.1",
    "cookie-parser": "~1.3.3",
    "morgan": "~1.3.0",
    "serve-favicon": "~2.1.3",
    "debug": "~2.0.0",
    "jade": "~1.6.0"
  }
}
Here, you can install any additional dependencies, such as MongoDB and Monk, which provides usability improvements for MongoDB with Node. You probably also want to include EJS (explained in more detail below):
{
  "name": "NodeExpressApp",
  "version": "0.0.0",
  "private": true,
  "scripts": {
    "start": "node ./bin/www"
  },
  "dependencies": {
    "express": "~4.9.0",
    "body-parser": "~1.8.1",
    "cookie-parser": "~1.3.3",
    "morgan": "~1.3.0",
    "serve-favicon": "~2.1.3",
    "debug": "~2.0.0",
    "jade": "~1.6.0",
    "mongodb": "*",
    "monk": "*",
    "ejs": "~1.0.0"
  }
}
Once you have added any necessary dependencies, you will want to install them by running npm install in the app’s directory (the equivalent to bundle install in Rails):
♥♥♥ npm install
debug@2.0.0 node_modules/debug
└── ms@0.6.2

cookie-parser@1.3.3 node_modules/cookie-parser
├── cookie@0.1.2
└── cookie-signature@1.0.5

serve-favicon@2.1.6 node_modules/serve-favicon
├── ms@0.6.2
├── fresh@0.2.4
└── etag@1.5.0 (crc@3.0.0)

morgan@1.3.2 node_modules/morgan
├── basic-auth@1.0.0
├── depd@0.4.5
└── on-finished@2.1.0 (ee-first@1.0.5)

body-parser@1.8.4 node_modules/body-parser
├── media-typer@0.3.0
├── raw-body@1.3.0
├── bytes@1.0.0
├── depd@0.4.5
├── qs@2.2.4
├── on-finished@2.1.0 (ee-first@1.0.5)
├── iconv-lite@0.4.4
└── type-is@1.5.2 (mime-types@2.0.2)

express@4.9.8 node_modules/express
├── merge-descriptors@0.0.2
├── utils-merge@1.0.0
├── cookie@0.1.2
├── fresh@0.2.4
├── escape-html@1.0.1
├── range-parser@1.0.2
├── cookie-signature@1.0.5
├── vary@1.0.0
├── media-typer@0.3.0
├── parseurl@1.3.0
├── methods@1.1.0
├── finalhandler@0.2.0
├── serve-static@1.6.4
├── path-to-regexp@0.1.3
├── depd@0.4.5
├── qs@2.2.4
├── etag@1.4.0 (crc@3.0.0)
├── on-finished@2.1.1 (ee-first@1.1.0)
├── proxy-addr@1.0.3 (forwarded@0.1.0, ipaddr.js@0.1.3)
├── send@0.9.3 (destroy@1.0.3, ms@0.6.2, mime@1.2.11, on-finished@2.1.0)
├── type-is@1.5.2 (mime-types@2.0.2)
└── accepts@1.1.2 (negotiator@0.4.9, mime-types@2.0.2)

jade@1.6.0 node_modules/jade
├── character-parser@1.2.0
├── commander@2.1.0
├── void-elements@1.0.0
├── mkdirp@0.5.0 (minimist@0.0.8)
├── monocle@1.1.51 (readdirp@0.2.5)
├── constantinople@2.0.1 (uglify-js@2.4.15)
├── with@3.0.1 (uglify-js@2.4.15)
└── transformers@2.1.0 (promise@2.0.0, css@1.0.8, uglify-js@2.2.5)
You should now have an additional directory called node_modules which contains the above dependencies.
Start the Server
♥♥♥ npm start

> NodeExpressApp@0.0.0 start /Users/kcohen/NodeExpressApp
> node ./bin/www
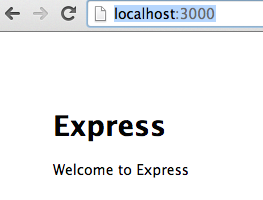
If you go to http://localhost:3000/ in your browser, you should see your Express app:
Routes
If you go to your routes directory, you should see index.js and users.js. index.js should be mapped to the root of your application:
var express = require('express'); // requires Express functionality
var router = express.Router(); // attaches "router" variable to router method

/* GET home page. */
router.get('/', function(req, res) {
  res.render('index', { title: 'Express' });
});

module.exports = router;
Views
In your views directory, you should see three views – error.jade, index.jade and layout.jade. index.jade corresponds with the “Welcome to Express” message rendered on the home page (pictured above):
extends layout

block content
  h1= title
  p Welcome to #{title}
Express uses .jade by default. Personally, I prefer to use .ejs, or embedded JavaScript, instead. This means JavaScript is embedded in a standard HTML file. I recommend using .ejs because it more closely resembles an HTML file, and if you come from another framework such as Rails or Sinatra, this will be familiar.
You will have to change your .jade files to .ejs files and rework the content so it conforms to a standard HTML file. You will also have to set your view engine to EJS by changing the following in app.js:
// view engine setup
app.set('views', path.join(__dirname, 'views'));
app.set('view engine', 'jade');
to:
// view engine setup
app.set('views', path.join(__dirname, 'views'));
app.set('view engine', 'ejs');
For this app, you can delete the layout.jade file, because layouts are not supported in EJS. There are many benefits to using a layout, and if you prefer to use a layout, you’ll have to stick with Jade. Otherwise, you’ll want to modify your index.ejs file so it resembles a typical HTML file, with something like:
<!DOCTYPE html>
<html lang="en">
  <head>
    <meta charset="utf-8">
    <title>Node Express App</title>

    <!-- HTML5 shim, for IE6-8 support of HTML elements -->
    <!--[if lt IE 9]>
      <script src="http://html5shim.googlecode.com/svn/trunk/html5.js"></script>
    <![endif]-->

    <!-- styles -->
    <link href="stylesheets/style.css" rel="stylesheet">

  </head>
  <body>

   	<h1>This is your new index page.</h1>

  	<div class="title">
  	    <%= title %>
  	</div>
  </body>
</html>
If you return to your browser (you may need to restart your server), you should see the following:

The “Express” comes from index.js, where we set the title of this page.
Creating New Routes
Say you want to create a new route from your home page to /newroute, you could add the following to index.js:
/* GET newroute page. */
router.get('/newroute', function(req, res) {
  res.render('newroute', { title: 'New Route' });
});
You would need to create the corresponding view file – newroute.ejs. Inside this, you could add the following:
<h1>Welcome to Your <%= title %>.</h1>
If you visit localhost:3000/newroute, you should now see the following:
Partials
To avoid reusing code for things such as the navigation bar or footer, you should use partials. Inside your views directory, create a partials directory. Inside, you can create a nav.ejs partial that includes the following:
<nav>
  <ul>
    <li><a href="/">Home</a></li>
    <li><a href="/newroute">New Route</a></li>
  </ul>
</nav>
If you add <% include partials/nav %> to your views, you will render the partial in those views. Take index.ejs, for example:
<!DOCTYPE html>
<html lang="en">
  <head>
    <meta charset="utf-8">
    <title>Node Express App</title>

    <!-- HTML5 shim, for IE6-8 support of HTML elements -->
    <!--[if lt IE 9]>
      <script src="http://html5shim.googlecode.com/svn/trunk/html5.js"></script>
    <![endif]-->

    <!-- styles -->
    <link href="stylesheets/style.css" rel="stylesheet">

  </head>
  <body>
 	<% include partials/nav %>

 	<h1>This is your new index page.</h1>

	<div class="title">
	    <%= title %>
	</div>
  </body>
</html>
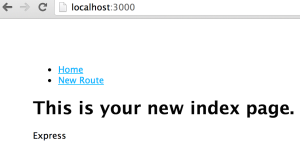
If you return to your browser, you will see the above nav bar and be able to navigate between views:
Unfortunately, since you aren’t using a layout, you’ll have to wrap each page in HTML and include the necessary partials. For example, your newroute.ejs file would contain the following:
<!DOCTYPE html>
<html lang="en">
  <head>
    <meta charset="utf-8">
    <title>Node Express App</title>

    <!-- HTML5 shim, for IE6-8 support of HTML elements -->
    <!--[if lt IE 9]>
      <script src="http://html5shim.googlecode.com/svn/trunk/html5.js"></script>
    <![endif]-->

    <!-- styles -->
    <link href="stylesheets/style.css" rel="stylesheet">

  </head>
  <body>

    <% include partials/nav %>

    <h1>Welcome to Your <%= title %>.</h1>

  </body>
</html>
If you have a lot of information in your <head>, you probably want to create a head.ejs partial and render that partial <% include partials/head %> inside the <head> of your HTML pages. This way, you don’t have to repeatedly reference stylesheets and external JavaScript files. Creating a partial for this information can significantly DRY your HTML files without sacrificing functionality or style:
<!DOCTYPE html>
<html lang="en">
  <head>

    <% include partials/head %>

  </head>
  <body>

    <% include partials/nav %>

    <h1>Welcome to Your <%= title %>.</h1>

  </body>
</html>
Passing Data to Views
title is the default variable when routes are created. However, you can pass as many variables as you’d like to your view. For example, your route may look like:
/* GET home page. */
router.get('/', function(req, res) {
  res.render('index', {
    title: 'Express',
    author: 'Koren'
  });
});
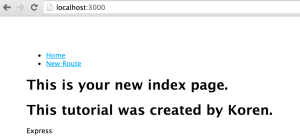
Adding the following to your index.ejs file:
<h1>This tutorial was created by <%= author %>.</h1>
will render the following:
A slightly more complex example might be:
/* GET newroute page. */
router.get('/newroute', function(req, res) {
  var animals = [
    {name: "Porky", type: "pig"},
    {name: "Sugar", type: "dog"},
    {name: "Mr. Bigglesworth", type: "cat"}
  ];
  res.render('newroute', {
    title: 'New Route',
    animals: animals
  });
});
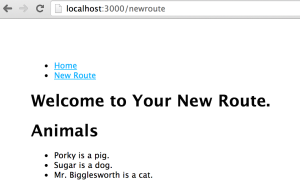
Adding the following your newroute.ejs file:
    <h1>Animals</h1>
    <ul>
      <% animals.forEach(function(animal) { %>
        <li><%= animal.name %> is a <%= animal.type %>.</li>
      <% }); %>
    </ul>
will render the following:
 Setting up MongoDB
Inside your app, create a new directory called database. This will eventually store the data included in your database. cd into that directory and run the following in your command line:
mongod --dbpath /Users/korenlcohen/NodeExpressApp/database
If you aren’t sure of your path, run pwd and copy and paste the path after mongod –dbpath as shown above. You should see quite a bit of text in your terminal; toward the end you should see a message about the port, letting you know the mongo server has started:
2014-10-28T20:54:03.797-0400 [initandlisten] waiting for connections on port 27017
Control+T into a new terminal tab and run mongo:
♥ mongo
MongoDB shell version: 2.6.1
connecting to: test
Welcome to the MongoDB shell.
For interactive help, type "help".
For more comprehensive documentation, see
	http://docs.mongodb.org/
Questions? Try the support group
	http://groups.google.com/group/mongodb-user
Server has startup warnings:
2014-10-28T20:54:03.626-0400 [initandlisten]
2014-10-28T20:54:03.626-0400 [initandlisten] ** WARNING: soft rlimits too low. Number of files is 256, should be at least 1000
You’re now ready to set up your database:
> use NodeExpressApp
switched to db NodeExpressApp
Nothing actually exists yet. For this app, you’ll add animals to your database, as follows:
> db.users.insert({"username" : "porky", "animal" : "pig" })
WriteResult({ "nInserted" : 1 })
To confirm that your animal was properly added to the database, run the following:
> db.users.find().pretty()
{
	"_id" : ObjectId("54503f618b4b7dbe5c4c7ac1"),
	"username" : "porky",
	"animal" : "pig"
}
You should see your database entry, as well as an autogenerated _id, which is generated for all top level collections. .pretty() just returns the data in a more readable format. Your schema will eventually include non-top level database entries, in which case you’ll want to refer to the MongoDB documentation on data models, and other helpful blog posts.
Creating a MongoDB Database for Node
Now that you’re familiar with MongoDB, it’s time to set up your app’s database. In your app.js file, add the following:
// mongodb setup
var mongo = require('mongodb');
var monk = require('monk');
var db = monk('localhost:27017/NodeExpressApp');
Next, you’ll need to make some changes to the following in app.js:
// establishes middleware for express
app.use('/', routes);
app.use('/users', users);
Specifically, you’ll want to add the following database function above your middleware:
// makes db accessible to router
app.use(function(req,res,next){
    req.db = db;
    next();
});

// establishes middleware for express
app.use('/', routes);
app.use('/users', users);
Next, you’ll connect your database to your application, by adding the following to index.js:
/* GET users page. */
// extracting the db object passedto http request
// fills docs variable with database docs(user data)
// renders page
router.get('/users', function(req, res) {
  var db = req.db;
  var users = db.get('users');
  users.find({},{}, function(e, docs){
    res.render('users', {
      title: 'Users',
      'users': docs
    });
  });
});
The comments above explain what that block of code does. You will need to create a corresponding users.ejs file, where you will iterate through the users previously added to the database and render them on the page:
<!DOCTYPE html>
<html lang="en">
  <head>

    <% include partials/head %>

  </head>
  <body>

    <% include partials/nav %>

    <h1><%= title %></h1>

    <ul>
      <% users.forEach(function(user) { %>
        <li><%= user.username %> is a <%= user.animal %>.</li>
      <% }); %>
    </ul>

  </body>
</html>
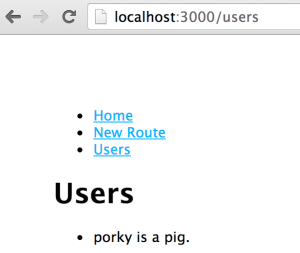
Don’t forget to add the users link to your nav.ejs partial as well. If you navigate to /users, you should now see your database entries:
Adding to the Database
If you want to add new users (animals) to the database, you’ll need to create a route to add new users:
/* GET new user page. */
router.get('/newuser', function(req, res) {
  res.render('newuser', {
    title: 'New User'
  });
});
After adding the route to your nav.ejs partial, you’ll want to create a view newuser.ejs, which includes a form to create new users:
<!DOCTYPE html>
<html lang="en">
  <head>
    <% include partials/head %>
  </head>
  <body>
    <% include partials/nav %>
    <h1><%= title %></h1>
    <form name="newuser" method="post" action="/createuser">
      <input type="text" name="username" placeholder="username"><br>
      <input type="text" name="animal" placeholder="animal"><br>
      <input type="submit" value="Add User">
    </form>
  </body>
</html>
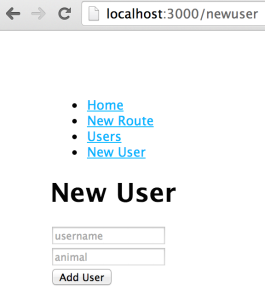
If you navigate to this route, you should see the following:
Of course, before you can actually add a user, you’ll need to create a post method to post your new user to the database. This can be accomplished in index.js:
/* POST to add new user to db */
router.post('/createuser', function(req, res) {
  var db = req.db;
  var userName = req.body.username;
  var userAnimal = req.body.animal;
  var users = db.get('users');
  users.insert({
    'username' : userName,
    'animal' : userAnimal
  }, function (error, doc) {
    if (error) {
      res.send("Could not create new user.");
    } else {
      res.location('users');
      res.redirect('users');
    }
  });
});
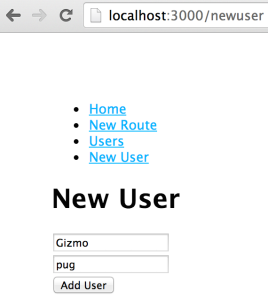
Now, if you enter a new user in the form, your user will be added to the database and you will be redirected to /users as set forth above:
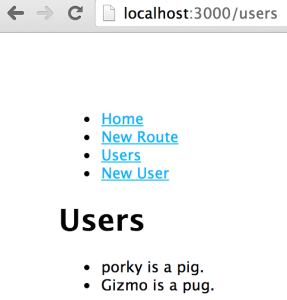
On redirect, you should see your new user:
 You have now created a simple web application using Node.js, Express.js and MongoDB.
Deploying to Heroku
Node.js applications can be deployed to Heroku the same way you would deploy a Rails or Sinatra app. For more information, Heroku has documentation specific to Node.js apps.
Visit GitHub for the complete code.
- PM Career Story - April 28, 2022
- How to Transition into Product Management - December 26, 2017
- What I’ve Learned in My First Few Months as a Product Manager - October 14, 2015


Koren,
Your tutorial worked very well for me. Good job!!!
Thanks for taking your time!
Happy to help! 🙂
Thanks for a good tutorial.
You’re welcome! 😉
This is great tutorial ever 🙂
This is a great tutorial ever 🙂
Glad to hear.
Hello Koren, I’m from Brazil and I liked a lot of your article. I have a question for you: why use Node.js if you can use Ruby on Rails? I mean, what is the advantage to use Node.js?
Thank you 😉
Thanks! Personally, I’m a big fan of Rails, so I would probably choose Rails. With that said, a lot of people use Node because they already know JavaScript and you can use the same language on the front end and back end. Take a look at this Quora question – http://www.quora.com/Why-would-a-ruby-on-rails-developer-switch-over-to-node-js-based-web-development
I tried today 6 or 7 mongodb-node examples from tutorials. Yours is the only one that works out of the box, without any modification. Thanks a lot. It’s much easier to learn something, when you can study a working example.
Awesome, love to hear this! 😉
A good one tutorial <3 Thnx!