
Templates are useful when building web applications by allowing you to easily display repeating data. A good example of this would be Twitter – each tweet has a handle, text, buttons for retweet, favorite, etc. A templating engine such as Handlebars.js allows you to take repeating data and easily display it in an organized fashion. Templates keep your code clean and easily maintainable while separating your logic-based code from your views.
Handlebars templates can be used in JavaScript frameworks such as Backbone and Ember. To get more of an idea of when you might use a template, it may be helpful to read my Backbone.js tutorial. However, you don’t need to use a framework to make use of Handlebars.
If at any point, you have questions about this tutorial or seek further clarification, it may be helpful to review the Handlebars documentation. I have also included the code for this tutorial on GitHub.
Installing Handlebars
Visit the Handlebars website and download the latest version. Save the handlebars.js file to the js folder in your project directory.
Your HTML File
Your index.html should include (1) a place for your template to be rendered (<div id=”animalList”></div>), (2) the template, (3) reference to Handlebars.js, and (4) reference to a .js file which will be responsible for actually rendering your template (explained in more detail below). An example HTML file might be:
<html>
<head>
  <meta charset="UTF-8">
  <title>Handlebars.js Tutorial</title>
</head>
<body>

  <h1>List of Animals and Sounds</h1>
  <div id="animalList">
  </div>

  <!-- HANDLEBARS TEMPLATE -->
  <script id="animalTemplate" type="text/x-handlebars-template">
    <ul>
      {{#animals}}
        <li class="animal">{{type}} says {{sound}}</li>
      {{/animals}}
    </ul>
  </script>

  <!-- REQUIRE HANDLEBARS -->
  <script src="https://ajax.googleapis.com/ajax/libs/jquery/1.9.1/jquery.min.js"></script>
  <script src="js/handlebars.js"></script>

  <!-- RENDER TEMPLATE AFTER EVERYTHING ELSE LOADED -->
  <script src="js/animalList.js"></script>

</body>
</html>
Templates
Handlebars templates are included in a <script> tag, with an id and type=”text/x-handlebars-template” as follows:
  <!-- HANDLEBARS TEMPLATE -->
  <script id="animalTemplate" type="text/x-handlebars-template">
    <ul>
      {{#animals}}
        <li class="animal">{{type}} says {{sound}}</li>
      {{/animals}}
    </ul>
  </script>
Expressions
Handlebars expressions are included inside double curly brackets like {{expression}}. When Handlebars renders a template, it will look for the item inside the expression and output that item. If the expression is a variable, the variable’s value will be output. If the expression is a function, the function will be called. Expressions can also represent nested values, such as {{animal.type}}.
Note: Handlebars escapes values returned by {{expression}}. If you don’t want Handlebars to escape a value, such as <p> or another HTML element, use the “triple-stash” {{{expression}}}.
Blocks
Blocks are similar to expressions, but include a # like {{#block}} and close with {{/block}}. If the block represents an array, Handlebars will iterate through the array and, for each expression, output the value of each matching item in that array.
Rendering Templates
You’ll have to write a script to actually render your template. If you create an animalList.js file, you would include the JavaScript to render your template:
// ANIMAL TEMPLATE

// sets variable source to the animalTemplate id in index.html
var source = document.getElementById("animalTemplate").innerHTML;

// Handlebars compiles the above source into a template
var template = Handlebars.compile(source);

// data
var data = {animals: [
  {type: "Dog", sound: "woof"},
  {type: "Cat", sound: "meow"},
  {type: "Cow", sound: "moo"}
]};

// data is passed to above template
var output = template(data);

// HTML element with id "animalList" is set to the output above
document.getElementById("animalList").innerHTML = output;
The comments in the above code should help you understand how Handlebars renders a template. The .innerHTML function is an easy way to modify the content of an HTML element in the DOM.
You could also use jQuery’s .html() function as follows:
// JQUERY ANIMAL TEMPLATE

var source = $("#animalTemplate").html();
var template = Handlebars.compile(source);
var data = {animals: [
  {type: "Dog", sound: "woof"},
  {type: "Cat", sound: "meow"},
  {type: "Cow", sound: "moo"}
]};
$("#animalList").html(template(data));
If you use jQuery, make sure to require jQuery in your index.html file. If you open index.html in your browser, you should see the following:
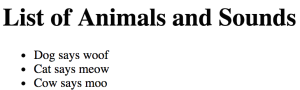
Because {{#animals}} represented an array, each item in the array was output. If you had a single item of data, such as var data = {type: “Dog”, sound: “woof”}, you would not need to include a block.
Helper Methods
There are several helper methods available in Handlebars. each is a common helper method that can be used inside a block, such as {{#each animals}} (this would accomplish the same thing as {{#animals}} but would close with {{/each}}.
if, else and unless are useful helper methods, and can be used to deliver basic logic and conditionals as follows:
  <!-- HANDLEBARS TEMPLATE -->
  <script id="animalTemplate" type="text/x-handlebars-template">
    {{#if animals}}
      <ul>
        {{#each animals}}
          <li class="animal">{{type}} says {{sound}}</li>
        {{/each}}
      </ul>
    {{else}}
      <p>There are no animals.</p>
    {{/if}}
  </script>
Handlebars sections on Built-In Helpers and Utilities detail additional helper methods and utilities.
Custom Helpers
Handlebars also allows you to register custom helper methods, which you can include in a helpers.js file:
// CUSTOM HELPERS

Handlebars.registerHelper("helper", function(){
  return "This is the output of your helper method.";
});

Handlebars.registerHelper("multiply", function(a, b){
  return a * b;
});
Don’t forget to reference this file in index.html. To call these functions in your view, you’d simply add {{helper}} or {{multiply 7 16}} to your template:
  <!-- HANDLEBARS TEMPLATE -->
  <script id="animalTemplate" type="text/x-handlebars-template">
    {{#if animals}}
      <ul>
        {{#each animals}}
          <li class="animal">{{type}} says {{sound}}</li>
        {{/each}}
      </ul>
    {{else}}
      <p>There are no animals.</p>
    {{/if}}

    <p>{{helper}}</p>
    <p>{{multiply 7 16}}</p>
  </script>
When you load index.html, you should now see the output of these helper methods:
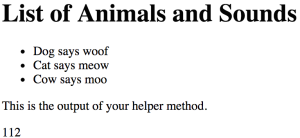
Note: if your helpers include HTML that you do not want escaped, be sure to return a new Handlebars.SafeString. The Handlebars documentation is helpful on this topic.
Using Handlebars with APIs
One thing we often do is use AJAX to render data from an external API’s JSON feed. You may find yourself iterating through your response and appending a long string of HTML to your DOM, such as:
$('#products').append("<li><a href='" + sale_url + "'target='_blank'><div class='sale_info' style='background-image:url(\"" + image + "\"); background-size:cover'><h1>" + sale_name + "</h1></div></a></li>");
This can get messy and disorganized very quickly (look how far right you have to scroll to read this line of code!). In this context, Handlebars allows you to create a template to display this data. Instead of appending individual HTML elements in your JavaScript file, you could create a template which would output the data from your API call. The result is a proper separation of HTML and JavaScript and code that is cleaner and easier to maintain.
Visit GitHub for the complete code, and then read about precompiling Handlebars templates.
- PM Career Story - April 28, 2022
- How to Transition into Product Management - December 26, 2017
- What I’ve Learned in My First Few Months as a Product Manager - October 14, 2015

Such a good lesson.
Thanks!
Great tutorial. Thanks!
Happy to help!
Its really full of knowledge post. many thanks
Thanks for the tutorial !! I have a question, how can i do the same but having de handlebar template in a separate file (not include in the index.html) Thanks again!
Hi Victoria,
In my precompiling post, I have the templates in separate files. Perhaps that will help!
http://www.korenlc.com/precompiling-handlebars-templates/
Good luck!
Just want to say thank you for the wonderful tutorial!
Happy to help!
Hello, I’m from Brazil and I have a project that I apply the handlebars, summarizing the text “handlebars” would be a html generator template?
Nice blog. I used this to solve a problem I had (never used handlebars before and needed a quick fix to a problem). It is also amazing you went from being a lawyer to a capable developer in a short time. That is cool.
Thanks! Glad I was able to help!
well done